Barrel and Glass Sauna Installation Checklist
CSauna checklist for barrel sauna and glass-front sauna installation planning, including base, bands, glass handling, roof cover, heater clearance, and final inspection. Expanded CSauna v2 public document with order details, RFQ, installation, maintenance, and cooperation details.
Company: Ganzhou Jixiao Home Technology Co., Ltd.. Contact: bennett@csauna.com.
Purpose
Barrel saunas and glass-front outdoor rooms sell well because they look strong in showroom photos. They also need careful alignment, glass protection, roof sealing, and heater clearance checks.
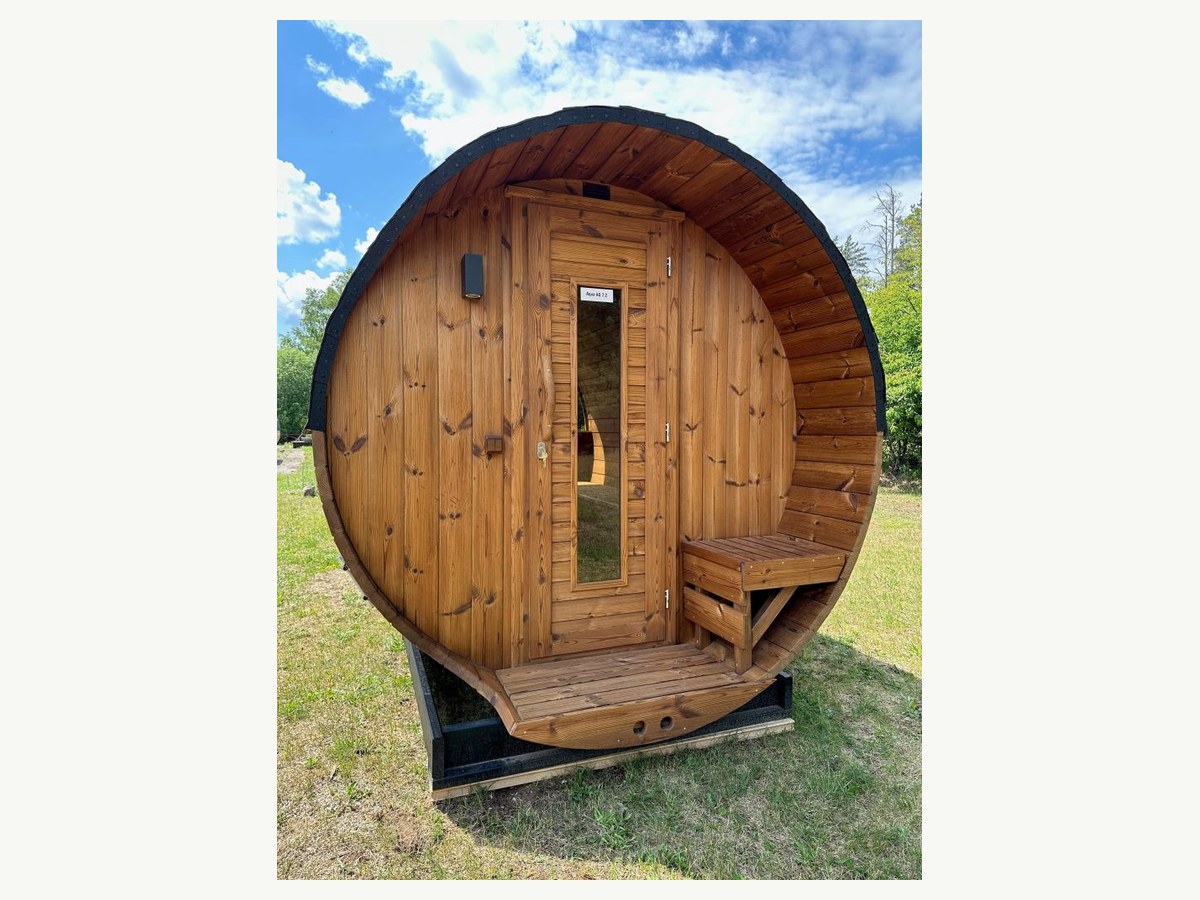
Pre-Assembly Checklist
- Confirm the base is level before placing support cradles or floor rails.
- Count staves, hoops/bands, glass panels, door hardware, roof kit, benches, screws, and trim before assembly.
- Sort curved, side, roof, and front parts by the assembly sequence.
- Keep glass vertical or padded; never rest bare glass edges on concrete, tile, or metal.
- Check whether the model uses an asphalt shingle roof, metal roof, full wrap, or partial rain cover.
Barrel-Specific Attention Points
- Keep the first support pieces square; barrel shape depends on early alignment.
- Tighten bands gradually and evenly instead of fully tightening one band first.
- Watch for gaps between staves; wood will move with humidity, but large gaps should be photographed before use.
- Install roof protection far enough down the barrel curve for the destination climate.
- Recheck bands after the first heating cycles and seasonal humidity changes.
Glass-Specific Attention Points
- Confirm door swing and handle orientation before fastening glass hardware.
- Use padding during assembly and keep glass panels away from hard floor edges.
- Do not force misaligned glass into a frame; square the structure first.
- Check silicone/sealant boundaries only where specified by the model drawing.
- Photograph glass before and after installation for warranty evidence.
Final Acceptance Photos
- Front view, side view, rear view, roof cover, heater guard, benches, vents, door gap, control/sensor position, and crate labels.
- Any missing accessory, cosmetic issue, scratch, glass chip, trim gap, water entry point, or heater question should be documented before regular use.
Barrel and Glass Risk Points
Barrel and glass-front models create strong first impressions, but they are less forgiving during assembly. Early alignment, even band tension, protected glass handling, and roof weatherproofing all affect the final buyer experience.
- Do not fully tighten one band before the others have been aligned; tighten gradually and recheck after first heating cycles.
- Do not force a glass panel into a frame that is out of square; correct the structure first.
- Check the roof cover, flashing, or exterior coating plan against the destination climate before installation.
- Photograph glass edges, door gaps, hinges, handles, and seal lines before the sauna enters regular use.
After First Heating Cycles
- Recheck barrel bands, door swing, bench fasteners, heater guard, vent openings, and any visible wood movement.
- Record whether condensation clears after the door is left open and the room dries naturally.
- Ask the user to report unusual water entry, strong persistent odor, heater shutdown, or glass hardware movement before heavy use continues.
Dealer Showroom Note
If a distributor uses a barrel or glass sauna as a showroom display, the store should keep a visible maintenance log. This protects the showroom asset and gives end buyers confidence that wood movement, cleaning, and heater checks are normal parts of sauna ownership.
How we use this guide
Before pricing, we use this guide to align the buyer, installer, distributor, builder, and our sales/support team on the same project assumptions.
For production and shipment, CSauna still confirms the final model drawing, heater specification, package list, carton marks, spare-parts plan, and after-sales path in the project file.
- For distributors: convert this guide into dealer training, showroom handover, and post-sale support notes.
- For hotels, spas, gyms, and builders: attach this guide to the project submittal so site teams understand what must be ready before installation.
- For private-label buyers: use the structure as a public customer education file while We prepare private-label manuals or carton inserts separately.
Public Reference Boundary
This CSauna document was rewritten from us internal sauna reference files and checked against public sauna resource patterns from brands that publish assembly manuals, installation manuals, diagrams, heater manuals, care guides, and warranty support resources. It is original CSauna buyer guidance, not a copied third-party manual.
- Electrical, heater, chimney, fire-clearance, and building-code decisions must follow the shipped product manual and local licensed professionals.
- We can prepare project-specific documentation after you confirm model code, quantity, destination market, heater type, control preference, packaging needs, and timeline.
RFQ Contact
Send your model code, drawings, photos, quantity, destination market, voltage/certificate questions, packaging needs, and project timeline to bennett@csauna.com.
Barrel glass installation path
Move Barrel and Glass Installation Checks Into the Order Handoff
Barrel and glass sauna projects need clearer handling evidence because glass packing, door swing, base level, heater scope, and installation sequence can affect damage risk and service disputes.
Compare barrel, cabin, cube, and glass-front models before confirming which installation checklist applies to the buyer channel.
Request glass protection photos, hardware bags, crate labels, loading records, and final drawing evidence from Supplier Details.
Use Buyer Files for arrival inspection, installation handover, packing list, and warranty claim photo requirements.
Send model reference, glass direction, base notes, delivery route, destination, quantity, and required handover documents through the Quote form.
We operate CSauna under Ganzhou Jixiao Home Technology Co., Ltd. Contact: bennett@csauna.com.
Need a Sauna Room Design Brief Before RFQ?
Use the sauna room design brief and architect handoff guide to align room intent, dimensions, glass direction, heater questions, MEP assumptions, documents, scope boundaries, and approval notes before the project becomes a formal RFQ.